16 Jan 2025
Post by Seraphiel
Introduction
Bi-wiring your speakers can elevate your audio experience by providing a clearer and more nuanced sound. This guide will walk you through the process of bi-wiring your speakers, explaining what it is, its benefits, and how to prepare and successfully complete the bi-wiring process. By the end, you’ll have the knowledge and confidence to enhance your home audio setup.
What is Bi-Wiring?
Bi-wiring is a method of connecting speakers that involves using two separate wires for the high and low-frequency drivers. Standard speaker connections use a single wire to carry both high and low frequencies. However, with bi-wiring, an additional wire runs parallel to the original, splitting the signal path and reducing interference.
This method can lead to improved sound quality. Bi-wiring allows the amplifier to control the high and low frequencies more effectively, which can result in a more precise and dynamic audio performance. Not all speakers support bi-wiring, so it’s essential to check your speaker specifications first.
Benefits of Bi-Wiring
Bi-wiring offers several advantages that can enhance your audio experience:
- Improved Sound Clarity: By separating the signals for high and low frequencies, bi-wiring reduces the chance of signal interference, leading to clearer sound reproduction.
- Enhanced Frequency Response: Your speakers can deliver a more accurate portrayal of audio signals, offering a fuller range from deep bass to crisp highs.
- Reduced Crosstalk: Eliminating shared pathways for signals minimizes the distortion caused by crosstalk, contributing to a more precise and cleaner sound.
- Better Amplifier Control: Each frequency range receives dedicated attention from your amplifier, optimizing performance and reducing strain on the audio equipment.
These benefits show the potential enhancements bi-wiring can bring to your audio system, making it a worthwhile consideration for audio enthusiasts.
Preparation Before Bi-Wiring
Before you begin the bi-wiring process, it’s crucial to prepare appropriately:
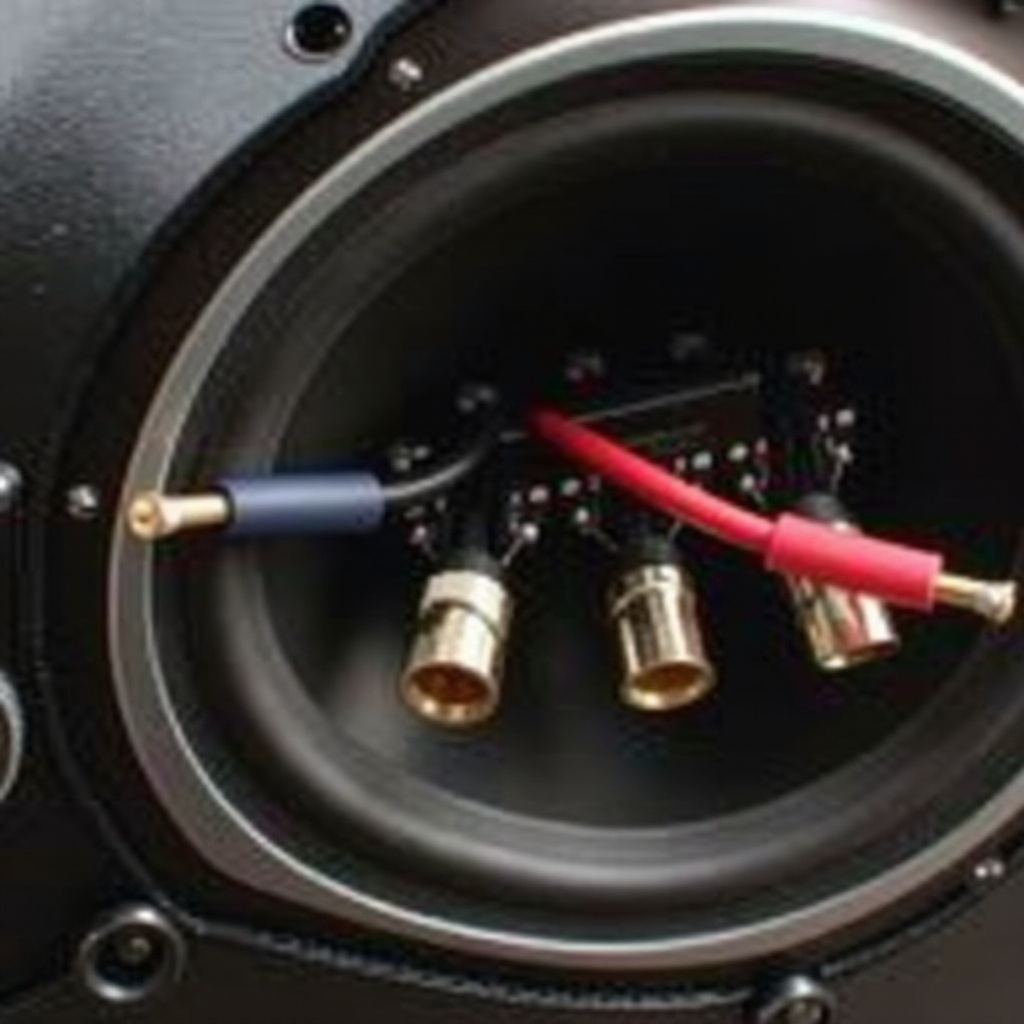
- Check Speaker Compatibility: Ensure your speakers are designed to support bi-wiring by looking for double binding posts at the back of the speakers.
- Review your Amplifier: Verify that your amplifier has enough outputs to support bi-wiring.
- Gather Tools and Materials: Ensure you have all necessary tools and materials, such as speaker wire, wire cutters, and connectors.
Being well-prepared makes the bi-wiring process straightforward and reduces the risk of any complications.
Step-by-Step Guide to Bi-Wiring
Step 1: Check Your Speakers
- Confirm whether your speakers are bi-wire compatible. Speakers suitable for bi-wiring will have four binding posts rather than the usual two.
- Inspect these binding posts for labels indicating high (HF) and low (LF) frequency drivers.
Step 2: Gather the Necessary Equipment
- Speaker Wire: You will need enough wire to connect your amplifier to both pairs of binding posts on each speaker.
- Connectors: Banana plugs or spade connectors can make the setup easier and more secure.
- Tools: Wire cutters and a screwdriver for any necessary adjustments.
Step 3: Disconnecting and Preparing Speaker Terminals
- Unplug the Current Setup: Completely power off your audio system and disconnect any existing speaker wires from your amplifier and speakers.
- Unscrew Binding Posts: Remove the metal bridges connecting the high and low-frequency binding posts. These bridges need to be removed to enable the bi-wiring setup.
Step 4: Connecting Speaker Wires
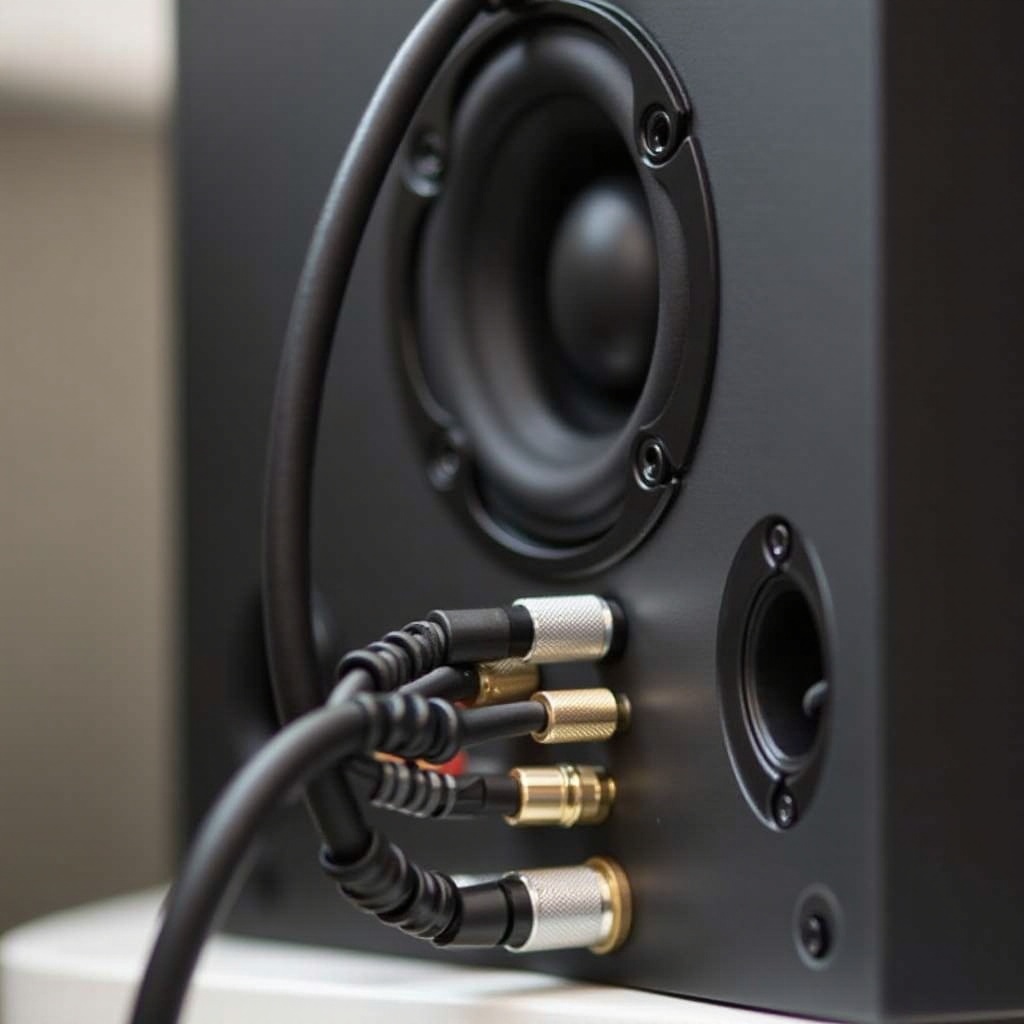
- Cut and Prepare Wires: Cut two lengths of speaker wire for each speaker. Strip the insulation from both ends to expose the bare wire.
- Connect to Amplifier: Attach each pair of wires to the corresponding outputs on your amplifier. Make sure the connections are secure.
- Attach to Speakers: Connect one end of each wire to the high-frequency binding posts (HF) and the other end to the low-frequency binding posts (LF) on your speakers. Ensure correct polarity (positive to positive, negative to negative) to avoid phase issues.
Step 5: Testing Your Setup
- Power On: Turn on your amplifier and audio sources to start the system.
- Play Audio: Use a test track or playlist that covers a wide range of frequencies to evaluate the sound quality.
- Check Connections: Listen for any distortion or imbalance. Ensure that each driver (high and low frequency) works correctly.
Common Problems and Solutions
Despite careful setup, issues may arise. Here are common problems and solutions:
- No Sound from One Driver: Verify wire connections and ensure no loose ends.
- Distortion: Check for any frayed wires or improper terminations that could cause signal interference.
- Phase Issues: Make sure all wiring polarity (positive and negative) matches across all connections.
Conclusion
Bi-wiring your speakers can significantly enhance your audio system’s performance. By following the steps outlined in this guide, you can enjoy clearer, more precise sound. Bi-wiring offers tangible benefits like improved sound clarity and better frequency response, making it an upgrade worth considering for audio enthusiasts.
Frequently Asked Questions
What types of speakers can be bi-wired?
Speakers with double binding posts at the back can be bi-wired. Check your speaker’s specifications to confirm compatibility.
Can bi-wiring damage my speakers?
No, bi-wiring itself won’t damage your speakers. However, incorrect wiring might affect performance, so follow instructions carefully.
What is the difference between bi-wiring and bi-amping?
Bi-wiring uses two wires from a single amplifier to connect to speakers, splitting frequencies. Bi-amping uses separate amplifiers for high and low frequencies, providing more power and control.